


Building a Race Bike for under $3,000
Here in Indianapolis in the middle of January it is often cold, grey, and wet. We spend a lot of time on the turbo trainer thinking about the next time we can get outside on the bike. A few of us are busy planning our racing for the year and we thought you might be in the same boat. Since not everybody has a world tour team bike or the budget to pretend like it, we thought it would be interesting to see what the best race set up we could put together for less than $3,000 USD. As we sit here in January of 2022, supply shortages are still a very real thing. Since a blog post that starts and ends with “I’d buy what is available,” we are going to pretend we are back in 2019 and bikes, accessories, etc are all available in plenty.
While $3,000 USD might be less expensive that some of the top end frames, with a lot of really great product out there we are going to see how we can get a race day set up for under $3,000 USD. Exploring the world of marginal gains we think we can get podium contending bike and gear set up. For the purposes of this post all of the selections will be based around the local road racing scene here in Indianapolis where we are headquartered. That means flat criteriums, lots of flat criteriums and not much else. We have a few “hilly” road races with the “climbs” being 1.2mi/2km and 270ft/82m. Like I said, flat and fast is the focus the focus here.
The Bike – CAAD13 Rim Brake in Black
There are so many great bikes out on the market right now. Carbon, Aluminum, Ti, Steel, and even a few Magnesium frames still floating around. With our budget in mind, this is going to be the biggest expense so I still need to leave plenty of room for upgrades and to complete the set up. The best bike for your budget is great, but you still need pedals, shoes, clothing, a helmet, etc. With that in mind I am going to go with what I think is the best budget race bike on the market today, the CAAD13.

To really stir up some arguments this bike is available in rim and disc brake configurations, and I am buying the rim brake version #savetherimbrake. In reality I am a huge fan of disc brakes but with a really tight budget, I would rather spend the extra $350 on some other items rather than disc brakes. I love the stopping power and reliable performance but for flat racing, I think there are better places to put the money. We can’t go without touching on the paint scheme which we have argued in the past is the number one reason to buy a bike. I am a sucker for a black bike with red accents so we are going to follow that theme throughout.
This gets us a great base to start from and at $1,950 that leaves us with $1,050 to complete the rest of our race set up.
The Wheels
Wheels are often seen as one of the first places riders want to upgrade on the bike. There are a ton of great reasons for this, you can often safe a pound of weight. I certainly don’t fall into the weight weenie camp but when you are talking about saving a full pound or 453.3g, that is certainly somewhere to pay attention. There are also some considerable aero benefits to be had. Stock rims are low profile, often have round spokes, and leave plenty of room to be improved.
Unfortunately for this project we are going to have to stick with the stock Fulcrum Racing 900 Wheels. Wheel upgrades certainly are “worth it” if you have the money to spend and since there are other places that are even more impactful, and some things like a helmet that we simply can’t do without, we are going to toe the start line this summer with the Fulcrum Racing 900’s. This still leaves us with $1,050 to spend and one of the best places to start is what is going to be mounted to those rims.
The Tires – Continental GP5000 TL 25mm $130 w/Latex Inner Tubes $42
One of the first things I am going to upgrade on my new bike is going to be the tires. The CAAD13 comes with Vittoria Zaffrino Pro Slicks in 25mm. Our friends at Bicyclerollingresistance.com list that stock tire at 15.4w loss at 100psi, vs just 8.3w with the GP5000 TL in 25mm. The beauty about tires is you get to multiply the gains by two which brings the tire upgrade to an astounding 14.2w!
Not only do you get the massive rolling resistance gains with the tire upgrade, you also get significant improvements in grip which will give you the confidence to not touch the brakes in the final corner. Races are often won or lost because of a small touch of the brakes.
To pair with these ultra fast tires, I am going to run our own Latex Inner Tubes. When compared to the butyl tubes that the bike comes with, they can save 2-5w/wheel. Call it 6w on the conservative side and we just saved 20w for a total of $172!
That leaves us with $878 to fill out the rest of our kit.
The Clothing – Pactimo Ascent 3.0 Skinsuit $162
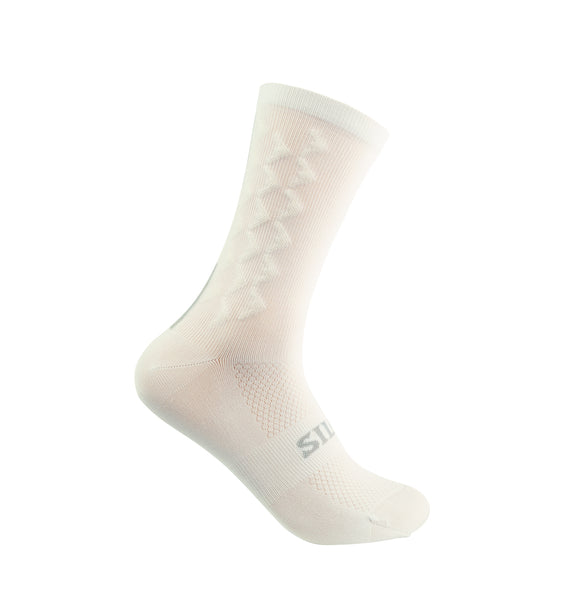
SILCA Aero Socks $30
This choice is a very personal one as every clothing item fits each person a little different. I have used these skinsuits in the past and find them to fit me well and be comfortable. While there are certainly faster options in the skinsuit category, it is still going to save you 3-5w at race speeds over a tight fitting, race fit kit. If you have a baggy jersey it could be 10-20w.
SILCA’s new Aero Socks can save 3-5w over a standard knit sock, but more importantly they are the most comfortable socks I have ever worn. I am probably biased but we keep hearing this over and over again from customers. Comfort is extremely important and having seen the data, they are faster as well.
With $686 left to spend it means I am going to need to start making some selective choices to make sure I get all the things I need on a bike.
The Helmet – Lazer Century MIPS $180
Aero helmets can be a big improvement on overall efficiency. The tricky piece about helmets is that they don’t perform the same on everybody. What might be the fastest option on the market for me, might be like a parachute for you. There are some that are generally fast, but there are certainly riders that are exceptions to that.
For our purposes here I am going to prioritize the helmet’s main function, protecting my head. With the budget in mind, I’m going to pick the fourth safest road helmet according to Virginia Tech’s safety testing. With a bigger budget there are some great options that are safe and extremely aero. For now I am going to prioritize trying to limit concussions rather than saving a couple watts.
Now with $506 left to spend we can finish out our bike build with some pedals and shoes.
The Pedals and Shoes – PD-S500 Pedals $64, Specialized Torch $120
Here at SILCA we have a thing for BOA. You see it on a lot of our seat packs, so I’m certainly going to make sure that I get a shoe with BOA dials. The Specialized Torch is a perfect option for what I am looking for. It is light on the wallet, has a BOA dial for a secure fit that is easy to adjust, and comes in all white to add a little contrast to the black frame.
I am also going to go with the Shimano PD-S500 pedals. This is purely a budget selection based on my tend to favor the Shimano SPD-SL pedal system.
Now that we have a fully ridable bike, a helmet, clothing, shoes, and pedals, it leaves $322 left so that we can make the set up faster, and maybe a little for style as well.
Accessories - $325
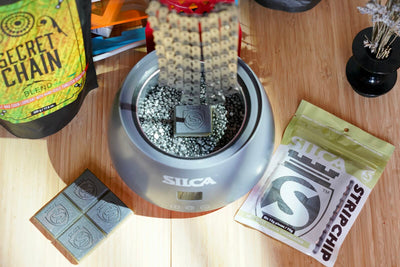
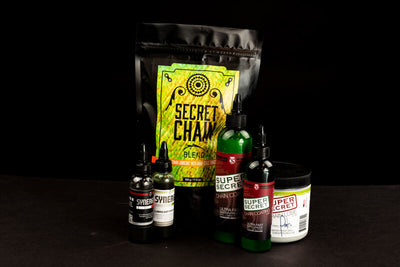
Super Secret Chain Lube - $25
SILCA re-entered the chain lube market after years of development with Super Secret Chain Lube. It was tested by Zero Friction Cycling to be the best emulsifying wax lube on the market at the time. It has only been matched by one other that has created something as close as possible to Super Secret but charge 50% more.
Not only is Super Secret Chain Lube so fast, but the cleanliness is incredible. The wax repels dirt and means you don’t get oils and grease on your hands if you do have a mechanical. It also will make your chain las longer which means your cassette and chainrings last longer as well and saves you money in the long run.
SICURO Ti Cage Black Cerakote - $85
One race in my second season of racing, I had upgraded out of the beginner category and was doing my first crit that was longer than 30 minutes. I am a big sweater so not bringing water for a 50 minute race is not an option for me especially considering that day was 90+ degrees. About 90 seconds into the race, I hit a man hole cover and popped my only water bottle out of its cage. Every lap for the rest of the race I saw that bottle sitting in the gutter and I was desperate for a drink.
I give you that long winded story to explain why on a budget build, I’m going with a single SICURO Ti Cage in Cerakote Black since races are usually 90 minutes or less. I don’t remember what cage I was running that day but I am going to pick a cage that I know has been tested over and over again with the main priority of not losing a bottle. Other cages out that boast about their security but they will also grab the bottle so tight that its impossible to get out. Our cages are easy to get the bottles in and out when you want to, but are held firmly in place. I have ridden 25,000+ miles with the SICURO Ti cages and have yet to lose a bottle. The black Cerakote is because its going to match the black frame perfectly.

NASTRO Cuscino Black/Black - $50
About 10 years ago I had the opportunity to try out a bar tape that was more expensive than any other I had ridden and boasted a great grip. It changed what I thought was ok to wrap my bars with. I really loved the feel of the tape but it had one really major problem for spending so much on tape, it wore out really quickly. Then I started racing more and really didn’t want to spend a lot of money on bar tape that would end up sliding on the pavement only to need to be replaced, and if I was lucky enough to make it through a month or two without an accident it would be worn anyway.
Then SILCA launched NASTRO Cuscino. It doesn’t have the same wearing issues as the other tape, it has a foam that keeps your hands comfortable on the roughest of days, and it has the only crash replacement plan in bar tape just in case you do go down and need to replace the tape. This is my go to tape for comfort and confidence. Just like tires, a little slip of the hand on the bars could be all it takes to lose a race on the bell lap.
Pista Plus Pump - $165
This is the SILCA blog so you probably are already aware how big of a deal tire pressure can be. Knowing that I am trying to save every watt possible on a budget, I am going with the Pista Plus Pump to ensure that the pressure I am running is dialed. We recently had a shop that was convinced our pump was reading incorrectly because a batch of pumps they had in the shop were all reading 7-10 psi higher than a Pista Plus they had in stock. We were curious and brought our lab grade gauge to check and before we compare this to some tire pressure gauge you can get on Amazon for $12, this one costs well over double our most expensive pump. We got there and found that our pump was indeed not perfect, but well within the 2% accuracy we expect. It was reading 81psi where the gauge read 82. The other pumps were just 6-9 psi high!
Don’t skimp on your pump because running 9psi different than what you were intending to could be the difference between sliding out and staying upright, a pinch flat or not, or simply just that last inch at the line.
Total Spend $3,003
I know I might have forgotten sales tax and went over the budget by $3 but we can say I sold my take off tires to get back under the budget. All in for less than $3k we came up with what I think is going to be a really great race set up. There are a ton of different ways to go with this and we would love to hear what you would change, what did we miss and, any other bike build articles you would like to see in the future. Leave your comments and suggestions below!


Fun article, and good on you to include the other gear and clotung, besides just the bike.
I would have thought you would have gone for an extra, ‘race day’ chain, and waxing? Both for the speed from the fast chain, and saving money and time on wear and cleaning?
The one I would say is money well spent, is a bike fit, and associated cost for bar, stem and saddle if needed. Especially if you have some bibs, helmet and jersey already, getting a good bike fit that lets you race and train without injury, and maintain an optimal position for aerodynamics, power and handling, will bring more benefits than a skinsuit, or new bar tape.
Why not recycle a high-end classic steel bicycle? A beginning racer can have a super ride and have plenty of training money left over for a custom paint job, applying marginal gains like the correct tires, tubes, replacement chain & SICLA wax lube, and essential accessories like the SICLA Pista pump.
Thanks for posting this blog. I generally agree with this article as you have chosen some great stuff if you had to buy new. However, if you are starting out in crits or if you are concerned about damaging your bike (like me) then I suggest buying a used bike. I bought a used, completely stock standard 2014 Cannondale CAAD10 (rim brake) with 10 speed Shimano 105 groupset back in 2019 (back when used bikes were still cheap!) for $550 AUD ($385 USD). It had one little dent in the NDS chainstay (cosmetic only). I spent the extra budget on:
- thread together bottom bracket to fix the BB30 creaking (ZTTO brand from Ali Express). Replaced crankset with 53/39 SRAM GXP one I had spare
- 56mm deep, 21.6 internal width, “Light Bicycle” branded carbon wheels which I built up myself (no sense damaging expensive branded wheels when racing)
- Michelin Power Competition tyres with latex tubes are nice alternative to Contis (which are also great).
I’m curious why you spec’d the GP500 TL tubeless tire and latex tubes. Since this is all about budget, why wouldn’t you save money (~$30) by buying the standard GP5000 rather than the TL? Or, run the 5000 TL tubeless and ditch the latex tubes, spending ~$7 on tire sealant and saving $36. You mentioned pinch flats talking about the Pista pump, so isn’t it worth it during a race to not have that worry by going tubeless?
Leave a comment